

Tuesday, July 19, 2011
B's First Birthday Cake!
So, i FINALLY finished my niece's cake. It took me FOREVER to finish and had quite a few set backs, but I think it turned out ok. I was originally going to cover it in fondant, but it kept melting in this southern heat, so I ended up covering it in buttercream frosting. The cake is a butter yellow cake, buttercream frosting, and fondant decor.

Sunday, July 17, 2011
4.5 lbs. of fondant = workout for the day
What a slow, uneventful day. The kids are at their grandparents, I slept in this morning, and I made a 4.5 lbs. batch of marshmallow fondant/daily workout. Phew! Can still feel the burn. Haha!
I;m making a birthday cake for my niece's first birthday; how exciting! It'll be my first time to make a girly cake, and my sister gave me free-reign on the decorating! Awesome?! YES! I definitely think pink is in order :)
So, while you wait for pictures of the final product, here's an AWESOME marshmallow fondant recipe!
This recipe makes about 2 1/4 lbs of fondant (i doubled just to be safe)
I'm super excited about this cake :) Stay tuned for the final product!
I;m making a birthday cake for my niece's first birthday; how exciting! It'll be my first time to make a girly cake, and my sister gave me free-reign on the decorating! Awesome?! YES! I definitely think pink is in order :)
So, while you wait for pictures of the final product, here's an AWESOME marshmallow fondant recipe!
This recipe makes about 2 1/4 lbs of fondant (i doubled just to be safe)
Ingredients
Directions
I'm super excited about this cake :) Stay tuned for the final product!
Thursday, July 14, 2011
P-P-P-Plant Pals!
Found this awesome craft that I'm totally going to do with the boys-- ok, maybe even one or two for myself :) You can check out the original craft post here

Instructions
Did you try this craft? Let us know how your kids loved it!
Plant Pals!
- Materials
- One 9- or 12-ounce plastic cup
- 1 to 1 1/4 cups of potting soil
- 1 tablespoon of grass seeds (we bought rye grass at a garden center)
- Decorations, such as office dot stickers, markers, and ribbon (for safety, it should measure less than 6 inches long)
- Fill the cup halfway with soil. Divide the remaining soil in two, then have your child measure the seeds and stir them into one of these halves.Tip: To speed germination, you can first soak the seeds in water overnight.
- Spoon the seed-filled soil into the cup, then top it with the remaining soil (this final layer should be about 1/8 to 1/4 inch deep). Water the soil well.
- Let your child decorate the cup with stickers and markers. Finally, leave the plant in a warm, sunny spot to sprout. Water as necessary to keep the soil about as wet as a damp sponge
Did you try this craft? Let us know how your kids loved it!
Wednesday, July 13, 2011
So, there's this thing called a coupon...
You may have heard about it. Apparently it's become quite the craze, especially Extreme couponing. I have a new coupon section in the works right now and you'll see it here soon!
I've added a poll to the side bar of this blog -- check it out and vote!
Looking for coupons? Check out my friend's Coupon Trader Facebook page HERE!
I've added a poll to the side bar of this blog -- check it out and vote!
Looking for coupons? Check out my friend's Coupon Trader Facebook page HERE!
Sunday, July 10, 2011
Keep Him Strapped In!
Hey everyone! Sorry for the absence. I've been trying to get things settled and on schedule now that Corey, my husband, is working third shift. It's really throwing us ALL off, but hopefully soon we'll be back to "normal".
So, I saw a video tonight and honestly, I bawled my eyes out watching it. We switched our 4.5 year old, 40+ pound son to a convertible booster seat, convertible meaning it's a booster seat with a back and a 5-point harness. We chose to use the seat as a booster. After watching this video we're going to be switching his seat back to a 5-point harness. I simply cannot imagine ever losing my child, especially if I could have done something to avoid it.
Check out these guidelines for car seat safety:
Newborns/Toddlers- Car seat type: Infant seats and rear-facing convertible seats General Guidelines: All infants and toddlers should ride in aRear-Facing Car Safety Seat until they are 2 years of age or until they reach the highest weight or height allowed by their car safety seat’s manufacturer.
Toddlers/Preschoolers- Car seat type: Convertible seats and forward-facing seats with harness General Guidelines: All children 2 years or older, or those younger than 2 years who have outgrown the rear-facing weight or height limit for their car safety seat, should use a Forward-Facing Car Safety Seat with a harness for as long as possible, up to the highest weight or height allowed by their car safety seat’s manufacturer.
School-aged children- Car seat type: Booster seats General Guidelines: All children whose weight or height is above the forward-facing limit for their car safety seat should use a Belt-Positioning Booster Seat until the vehicle seat belt fits properly, typically when they have reached 4 feet 9 inches in height and are between 8 and 12 years of age.
Older Children- Car seat type: Seat belts General Guidelines: When children are old enough and large enough to use the vehicle seat belt alone, they should always use Lap and Shoulder Seat Belts for optimal protection.
So, I saw a video tonight and honestly, I bawled my eyes out watching it. We switched our 4.5 year old, 40+ pound son to a convertible booster seat, convertible meaning it's a booster seat with a back and a 5-point harness. We chose to use the seat as a booster. After watching this video we're going to be switching his seat back to a 5-point harness. I simply cannot imagine ever losing my child, especially if I could have done something to avoid it.
Watch this video, share it with your friends, and love on your little ones a little extra today.
Check out these guidelines for car seat safety:
Newborns/Toddlers- Car seat type: Infant seats and rear-facing convertible seats General Guidelines: All infants and toddlers should ride in aRear-Facing Car Safety Seat until they are 2 years of age or until they reach the highest weight or height allowed by their car safety seat’s manufacturer.
Toddlers/Preschoolers- Car seat type: Convertible seats and forward-facing seats with harness General Guidelines: All children 2 years or older, or those younger than 2 years who have outgrown the rear-facing weight or height limit for their car safety seat, should use a Forward-Facing Car Safety Seat with a harness for as long as possible, up to the highest weight or height allowed by their car safety seat’s manufacturer.
School-aged children- Car seat type: Booster seats General Guidelines: All children whose weight or height is above the forward-facing limit for their car safety seat should use a Belt-Positioning Booster Seat until the vehicle seat belt fits properly, typically when they have reached 4 feet 9 inches in height and are between 8 and 12 years of age.
Older Children- Car seat type: Seat belts General Guidelines: When children are old enough and large enough to use the vehicle seat belt alone, they should always use Lap and Shoulder Seat Belts for optimal protection.
All children younger than 13 years should be restrained in the Rear Seats of vehicles for optimal protection.
**There are car seats that allow you to use a 5-point harness up to 80 lbs. One such seat is the Britax Regent. Please keep your child in a 5-point harness until he or she can no longer fit the weight and height requirements.
Thursday, June 30, 2011
Mmmmm, Cake....
I love baking. But mostly, I love sculpting and decorating cakes. I'm so far from professional, it's quite a miracle I can bake something even the least bit edible. But that will never stop me from trying! I love to experiment and practice with new techniques (most of the "techniques" are super trailer park ghetto-fied, as I have next to none of the proper tools needed), and would love to one day stock up a big, beautiful, state-of-the-art kitchen with every cake decorating tool I could possibly get my hands on. But for now, I'm stuck with what I have, and actually don't think the cakes turn out too bad, in retrospect. So here are a few cakes that I've made so far:


This was my very first cake. It was for my oldest son's 2nd birthday, done completely free-hand.

This is my second cake and my first time working with fondant. I made it for my husband's birthday.

I made these cupcakes for my youngest son's birthday. They were so cute!

This cake is an unfinished electric guitar. lol :) I made it for another birthday for my husband.

This cake I made just recently for my dad's birthday. It was done with buttercream frosting, smoothed it down like fondant, and then painted it. The zebra print on the sides are the new Sugar Sheets by Wilton... love those things!!
I'm definitely no where near where I want to be, but I welcome any chance I get to practice :) I might start making cakes and giving them away to my friends and family... less temptation if they're sitting on someone else's counter :)
What's For Dinner? 6/30
Asian Sesame Yellowfin Ahi Tuna with Roasted Asparagus

We had this tonight, and it was a big hit!
Ingredients:
2 lbs. Ahi tuna steaks
1/3 cup honey
1/3 cup thinly sliced green onions
2 T. soy sauce
2 T. toasted sesame seeds
1 T. minced garlic
1 t. minced onions
3/4 t. ground ginger
1/2 t. crushed red pepper (optional)
Mix all ingredients, except tuna steaks and red pepper flakes, in a small bowl. Stir in red pepper to taste. Place steaks in a 13x9 baking dish. Spoon mixture evenly over tuna.
Roast tuna in a preheated 375 degree oven for 20 minutes or until fish flakes easily with a fork. Baste occasionally with the honey mixture.
Roasted Asparagus
Ingredients:
1 lb asparagus
1 1/2 T olive oil
salt
Remove the woody bottom part of asparagus spears (the bottom inch or two)
Place asparagus on a foil lined baking sheet and drizzle with olive oil.
Sprinkle with salt to taste.
Toss spears to evenly coat with olive oil.
Roast in a 425 degree oven for 10-15 minutes to desired tenderness. The spears should be tender when pierced with a fork.
My family eats fish maybe once every few weeks, so since we don't eat it very often I get the individually vacuum packed steaks. The brand I used tonight was Full Circle Wild Caught, All Natural Yellowfin Ahi Tuna Steaks. I was really surprised that the size and thickness of the steaks were quite big. Will definitely buy again! Let me know if you tried this... would love to know how your family liked it.w
Killing two birds with one stone
I'm always trying to find a way to get more organized with my time, whether it's with long lists, silly games, or monotonous daily chores, but I've come up with an idea that very well may solve my time management problems. Where they go, I shall follow. Meaning, if the kids are playing in the living room, clean the living room. If they're eating lunch in the dining room, sweep up under the table and sort through mail, paperwork, and other clutter. If they're taking a bath, scrub the toilet, sink, and mop the floor. Right now the boys are taking a bath, therefore I'm now blogging from a sparkling bathroom. Right next to the bath tub. Note to self: find out when the warranty is up on my laptop...
Wednesday, June 29, 2011
What's For Dinner? 6/29
What's For Dinner?
Taco Casserole!

Ingredients:
1 lb ground beef
1 (1 1/4 ounce) package taco seasoning
1 (15 ounce) can refried beans
2 cups monterey jack cheese, divided (or mixed cheddar, jack etc.)
1 cup salsa
2 green onions, chopped
1 (2 1/3 ounce) can sliced black olives
1 tomato, chopped
2 cups corn chips, coarsely crushed or chopped
1 Brown ground beef and drain.
2 Add taco seasoning and cook according to package directions, adding proper amount of water.
3 Put corn chips on bottom of 8x8" dish.
4 Cook refried beans on stove until hot.
5 Add 1 cup cheese and 1 cup salsa. Stir until combined.
6 Pour beans over corn chips in dish.
7 Add beef to top of beans.
8 Sprinkle remaining cheese over top.
9 Sprinkle green onions and black olives over cheese.
10 Bake in a 375 degree oven until the cheese is sufficiently melted.
11 Take out of oven and sprinkle chopped tomatoes on top. Wait 1-2 minutes and then serve.
Can we say Muy yumm-o??
And to top it off, ground chuck is on sale at Publix this week for $2.29/lb, and so is the cheese-- Kraft shredded cheese $2
Taco Casserole!
Ingredients:
Got a Flip in my Flop
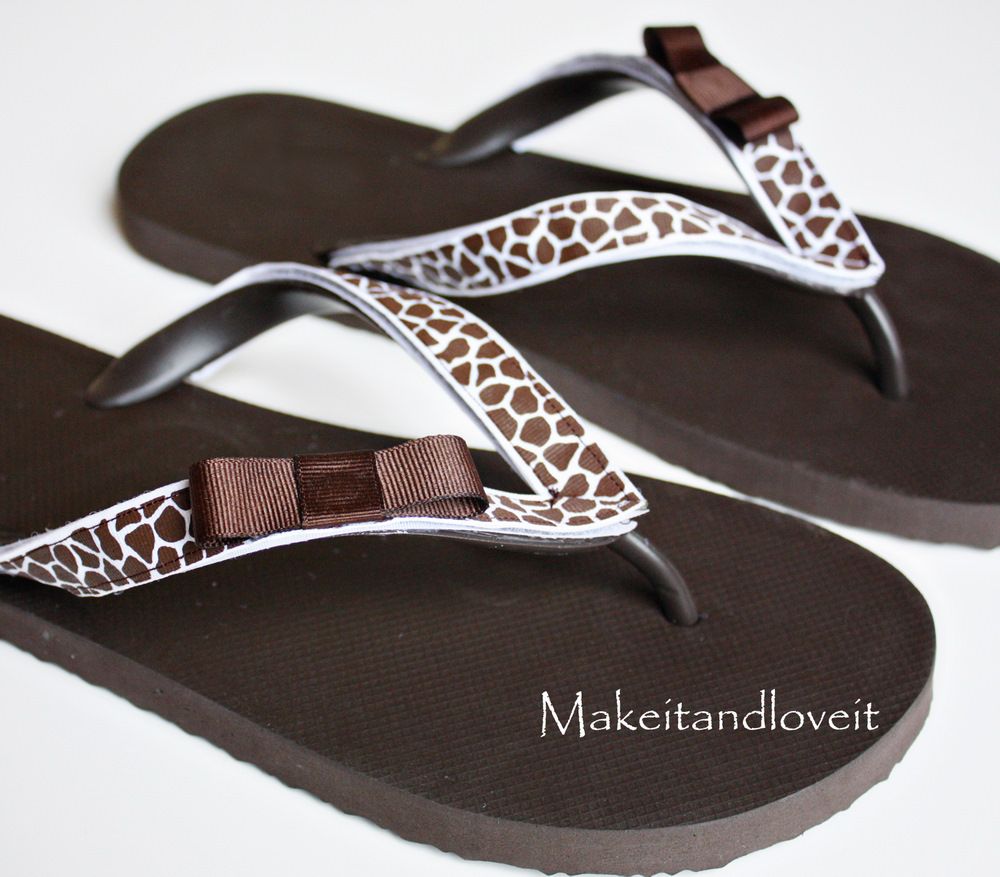
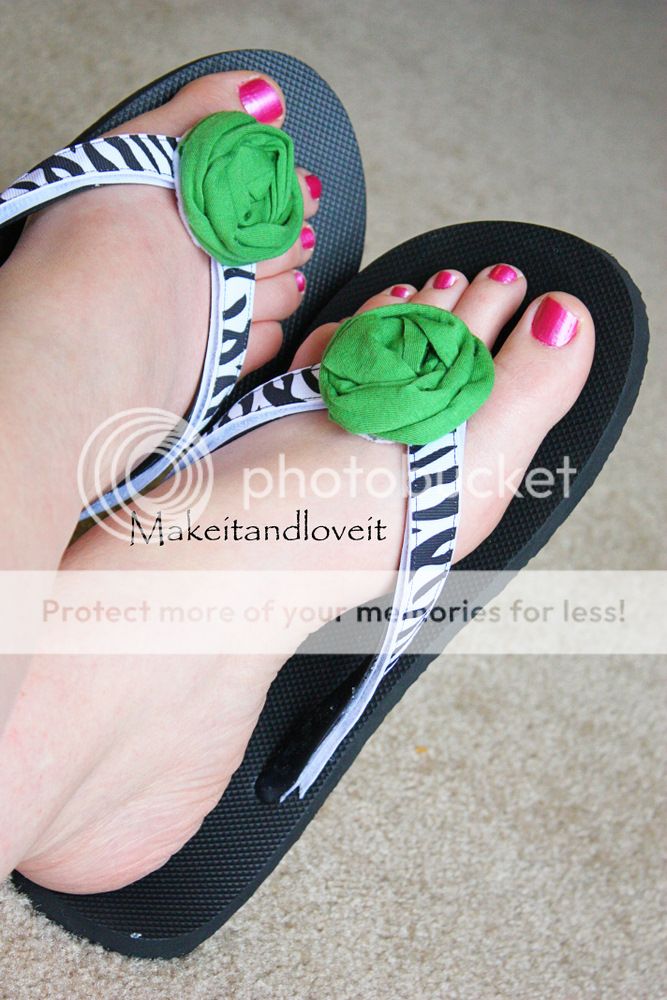
Saw these super cute interchangeable flip flops on another blog and had to share! You can check out the whole post here.
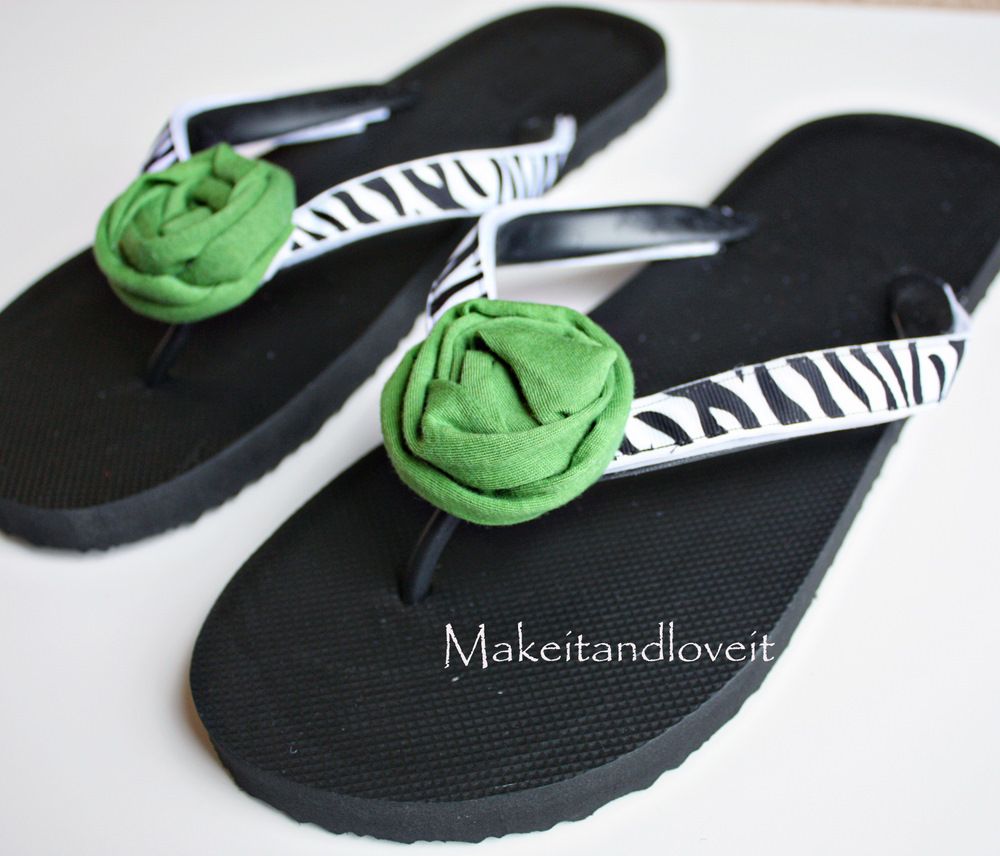


Are you ready for the sun?
Ready to paint those toe nails and slip into some sandals?
I am too.
And I decided to greet spring (that will be here soon) with some flip-flops, with interchangeable straps.
So I can start the day with some color and print…..
Then change my mind.
And take off the strap…..
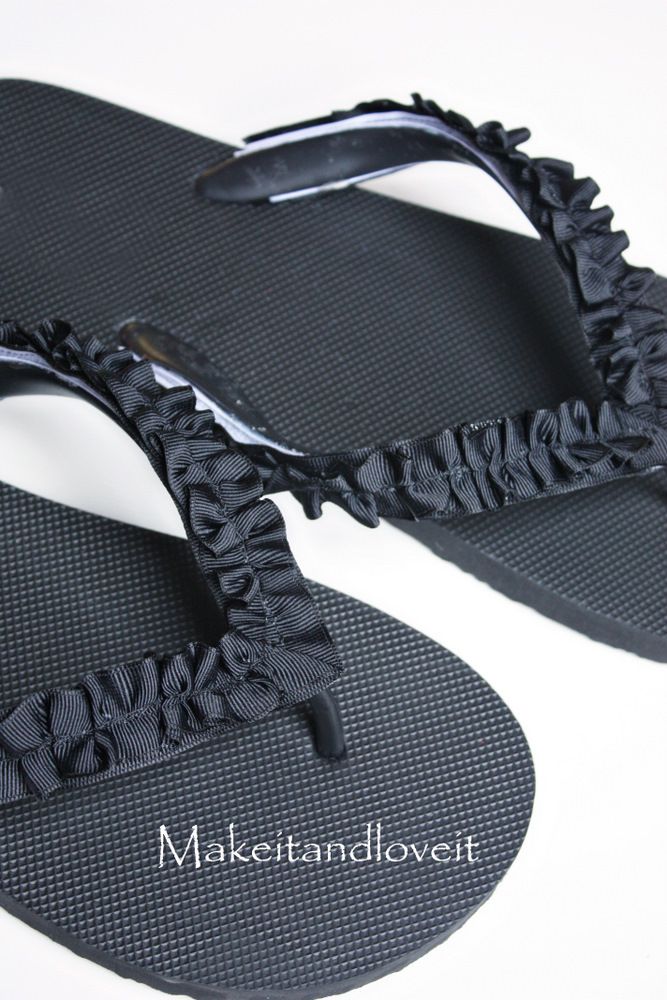
……..and switch to a solid ruffle.
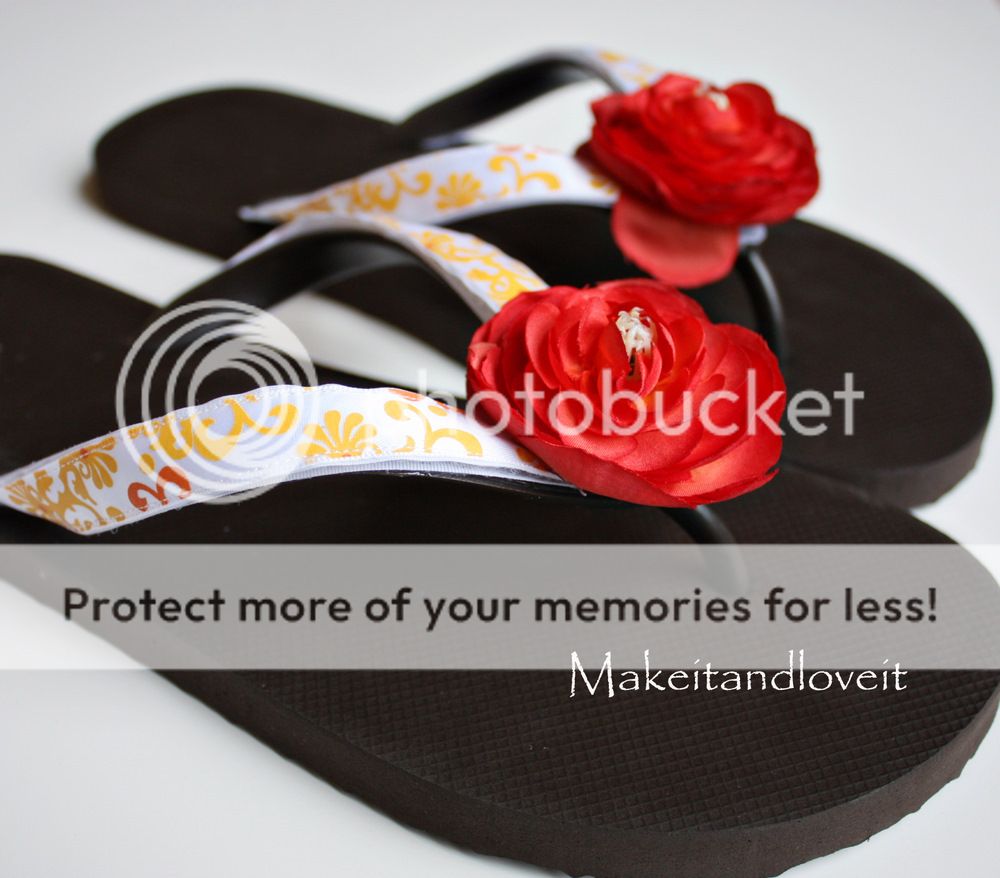
Then choose some warm colors and sweet flowers the next day……
And then animal print with a simple bow the following day.
All you need is one pair of flip flops (or two in my case), some velcro, and any sort of colored ribbon and accessory that puts you in the mood for summer.
How to make your own??
Find yourself any pair of flip-flops. I found mine at Old Navy……2 for $5. But you could do this with a nicer pair…..even a leather pair. Give it a try.
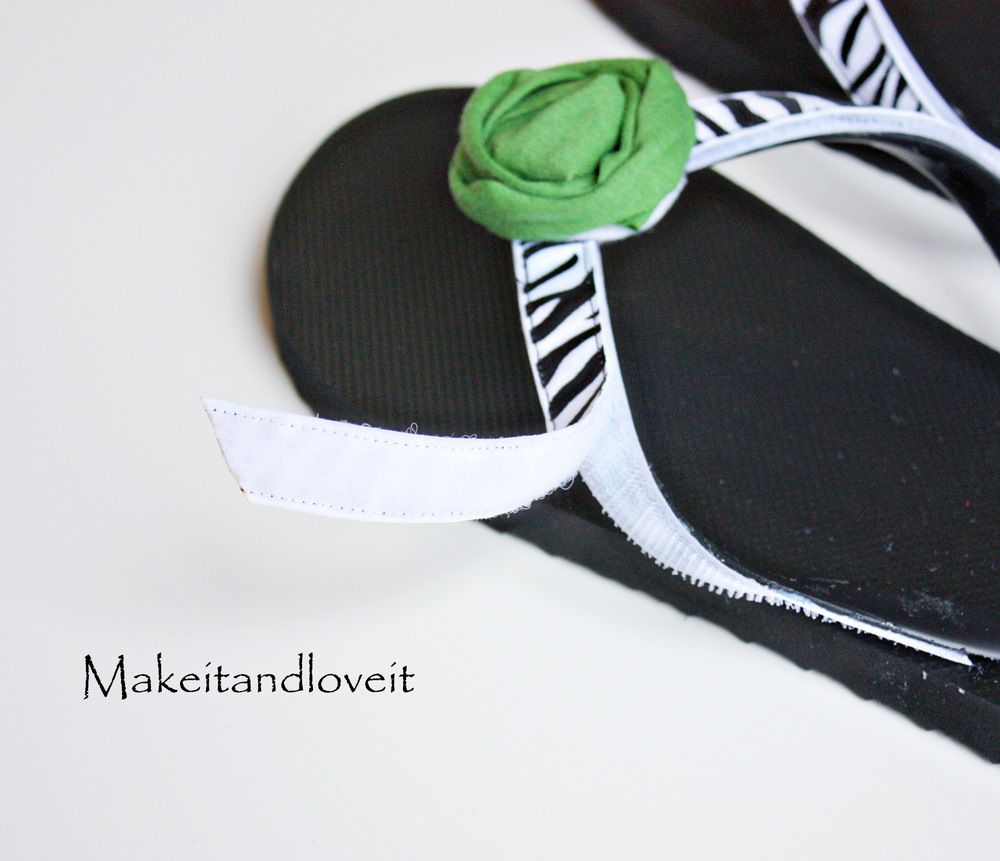
Start by cutting two pieces of the scratchy side of the velcro and gluing them to the flip flop. I didn’t take a closer picture but cut the two pieces at an angle so that they will fit together like an upside down “V” right by the toes. (And I placed the scratchy side of the velcro here, so that the interchangeable pieces with the velcro facing down would be soft, and wouldn’t scratch my feet.)
I used a strong epoxy glue that I found at Wal-Mart. I boughtthe non-toxic variety because shoes always seem to end up near little mouths in my house. But there are many epoxy glue’s to choose from. (Hot glue is not strong enough to keep the velcro attached.)

Next, cut two pieces of ribbon and sew them together at one end at an angle. (Make sure to purchase ribbon that is wider than your flip-flop strap and wider than your velcro.)

Then open it up and see if the angle is just right for your flip-flop. If not, re-sew a different angle.

If it works just right, trim the ends and then heat seal the raw edges with a lighter.

**Tip: After you have opened up your “V” and it’s just a little too pointy or a little uneven…..just use the lighter to melt the ribbon a bit and that will even out the imperfections. Or trim with scissors first and then melt with the lighter. Works wonders.
Then cut two pieces of the soft side of the velcro to fit on the back side of you “V”. Cut each end of the velcro at the same angle as your ribbon, so that they will fit together nicely. Sew your velcro to your ribbon.

Then turn it over and add any sort of flower, ribbon, button, fabric yo-yo, ruffle, etc.

Now it’s time to attach it to your flip-flop. (Make sure the glue on the flip flop has dried thoroughly.)

***Also, cut the 2 ends of the ribbon at an angle so that it almost reaches the end of the straps of the flip-flop. See how the end above is cut at an angle?
Now make more.
And be as creative as you want……
And be as creative as you want……

Then make some for the little ones in your house.


Make sure you check out the Make It and Love It blog for lots of other cool stuff! (link at top of post)
If you get the chance to try this out, send me a pic and I'll post it! I'd love to see it!
What's For Lunch? 6/29
What's For Lunch?
Chicken Salad Sandwiches!

Ingredients on sale this week:
4 cups cubed, cooked boneless skinless chicken breasts (@Walmart, $1.88/lb -- if you have left over, or even canned chicken, use it!)
1 1/2-2 cups Hellman's mayo (@Publix, $2.67)
1/4 onion (@Publix 79c/lb)
1cup celery, chopped (@Bi-Lo $1.49)
Ingredients on hand:
2 T. lemon juice
salt and pepper
2 T. fresh parsley, chopped
1 t. dill seed
Directions:
Mix all ingredients, let chill, and spread on bread for sandwiches
For a bit of a change up, try mixing in diced cucumbers and tomatoes, and instead of bread, use tortillas, flat bread, crescent rolls, or pita pockets.
Tuesday, June 28, 2011
Oooh, Shiny!
Saw a post on CD mobiles and thought "What a great idea!" These things look pretty dang cool, and we all know our kids love shiny things. Ok, we ALL love shiny things :) I'm willing to bet we all have CDs and DVDs that have been mysteriously destroyed or worn out over the years, so this is something easy, and cheap, for anyone to make with the kids. Check out these pictures of mobiles I've found


A little fishing line, a stick or dowel rod, hanger, or something else around the house to tie the line to, and you're ready to start creating! The kids can paint, glue sequins to, or decorate the CDs any way they like. One cool thing you can try also is putting a CD into the microwave for a couple seconds. It literally only takes a second, so stay right there at the microwace and watch it carefully. The label on the CD will crinkle up and give it a really cool effect like this

So give it a try and let me know how it turned out, and send some pictures to share! The boys and I might try this some time in the next week or two, so I'll post some pictures up for you.


So give it a try and let me know how it turned out, and send some pictures to share! The boys and I might try this some time in the next week or two, so I'll post some pictures up for you.
This is where I would post What's For Dinner
But my hubby, Corey, decided to take us out for dinner tonight! Couldn't tell you the last time we went out to dinner as a family, but it's been long over due. Tonight was a special occasion celebrating Corey's new job! We ended up at Bull Feathers right on the lake in Anderson (kids eat free Mondays and Tuesdays!) I'm so proud of him and am excited to see how everything works out. God has been so good to us with His provision through a time of struggling, and he continues to bless us still.
It was bedtime for the boys when we got home, so while we were settling down into bed my 4 year old, Jonathan, tells me "Mommy, my room smells like butt." So, yeah, obviously if you're cleaning crayon off your walls with WD-40, a well ventilated room is a definite must. :)
I have a post in the works for Couponing For Dummies, so be on the look out for it! I'll have lots of good info, tips and tricks, and references to check out!
Do you coupon? How much time do you spend each week gathering and clipping them?
"You got WHAT on WHERE?!"
It's inevitable. The kids have been napping for over 2 hours now. You love the peace and quiet, but are starting to get a little worried because it's 3pm and if they sleep any longer, they won't go to bed tonight. You tip toe to the door and hear little giggles. You think, in disbelief, "Surely my children aren't playing nicely together, are they?" Giving them the benefit of the doubt, you slowly open the door with a smile on your face at the thought of a Hollywood perfect sibling bonding. That's when you notice the crayon in your youngest child's hand, and his puppy dog eyes staring up at you. "How did that get in here?" You feel the anxiety start to flutter. Then your oldest points to the other proclaiming "He did it." The door is flung open and your two beautiful, innocent, sweet-hearted children have become monsters who have been sent here to torment you for the rest of your days. They didn't leave a single wall untouched. They even managed to leave their mark above the closet door (which is a totally different blog for another time.)
Yes, it happens. Children have an unnatural ability to create messes and stains out of absolutely anything. I battled one patch of such crayon artwork this afternoon, and was actually quite surprised at how effective it was.
I walked in on this:

And walked out with this:

All because of this:

(Dino moral support)
How'd I do it? With WD-40, and a clean sponge. For a large job, you'll want to have a small bucket of water near by to rinse out the dirty sponge so you don't smear the crayon around.
I was really surprised at how wonderfully this worked. Now I need to go get another can of WD-40 so i can finish the rest of the walls.
On the topic of stain removal, here are a few other common stains, and tips on how to remove them.
Make-up stains:
You Will Need
Baking soda
Scrub brush
Peroxide
Shout Stain Remover
Bleach
For most any makeup stain, whether it is foundation, eyeshadow, blush or mascara a paste of baking soda and water scrubbed into the stain and allowed to sit overnight will probably remove the stain. Launder the next day in warm water using your normal laundry detergent. Check to see the stain is gone before putting the garment into the dryer. The heat of a dryer will set the stain permanently. If the stain hasn't been removed, blot with peroxide and let sit. You may need to repeat a few times.
Lipstick is also a stubborn stain and should be treated as a grease stain. Use hot water and stain remover and allow it to sit, then launder. If any of the color remains, then bleach the garment in a gallon of water with 1/4 cup of bleach added. Rinse well then launder as usual.
Fat, oil stains:
You Will Need
Cornstarch
Iron
Paper towels
Once the fat or oil (gravies, salad dressings, etc) is dry, rub cornstarch into the stain. Allow to sit 20 minutes, then brush off cornstarch. Repeat several times to completely remove stain. If the stain is particularly stubborn, place a paper towel on the inside and the outside of garment, and with the cornstarch sprinkled on the stain, iron the stain with a hot steam iron.
Ink pen stain:
You Will Need
Ultra-hold hairspray
To get an ink stain out, spray ultra-hold hairspray on the stain, let it dry, then wash like normal. ( Don't be afraid of putting too much hairspray on the stain.)
Stubborn undergarment stains (perfect for potty training kids!):
You Will Need
1/2 cup Dishwasher detergent
Pour a half cup of dishwasher detergent in with your soiled undergarments and put it through a normal cycle.
Melted wax in clothing:
You Will Need
Brown paper bag
Hot iron
Lay a brown paper bag over the garment before you iron over it then keep moving the bag around it will absorb the wax.
Permanent marker on wood floors/furniture/smooth surfaces
You Will Need
Alcohol
Hand Sanitizer
Mr. Clean's Magic Eraser
Use either alcohol or hand sanitizer to scrub the stain with a magic eraser. It'll pull the stain right up! (This trick saved my wood floor AND my 2 year old son's life yesterday--hahaha!)
You Will Need
Alcohol
Hand Sanitizer
Mr. Clean's Magic Eraser
Use either alcohol or hand sanitizer to scrub the stain with a magic eraser. It'll pull the stain right up! (This trick saved my wood floor AND my 2 year old son's life yesterday--hahaha!)
Have any stain removal tips of your own? Post them in a comment!
Subscribe to:
Comments (Atom)